
Wednesday, July 27, 2011
Delays and potatoes
I'm embarrassed that I haven't updated the small surburban farm blog. Trying to finish writing a novel is my excuse and I'm sticking to it. Luckily said book is finished for the most part so it's freed up some time to write something other than a supernatural saga. So here I am.
We've done alot here at chez small suburban farm since my last post - a day out with Joel Salatin, a class on pest mgmt, grafted some trees, seeded and planted three vegetable gardens and a whole host of things that I've completely forgotten. As I go through the pictures on my laptop, I will no doubt write a whole slew of blog posts to catch up on what was a busy Spring season. For now, I just want to get up to date on the vegetable situation.
The Veggie Patch
I'd like to say that we have a bumper crop of veggies this year, but sadly, this would be a lie. This time last year we were swimming in tomatoes, cucumbers, eggplants, and cantaloupes. Right now, we harvested tons of potatoes (thank you darling husband), kale, spinach, some carrots, and perhaps a handful of beets and tomatoes. Cucumbers have been a real bummer so far and this is the first year that I've actually lost cucumber plants. As usual the vine borers are taking out squash and melon vines left, right, and center. I've got to come up with some sort of solution for those little evil maggot worms or I'm going to scream (please, please send me advice if you've got any).
The good news is we've still got time to harvest and so we might still get some decent crops before the October frost. I've put more beans in, have transplanted some tomatoes to sunnier spots and have tried to stay on top of the weeding/bug issue. Vine borers and deer seem to be enemies no. 1 & 2 this year with flea beetles right behind them in 3rd position. Funny enough the slugs and stink bugs haven't been overly bad (ed. - knocks on wood).
Anyhow, here's a picture of Jon with our potato crop, a mix of Caribe, Yukon Gold, Russian and English fingerlings. We got almost 2 five gallon pails full.
And a few carrots and tomatoes, too!

We've done alot here at chez small suburban farm since my last post - a day out with Joel Salatin, a class on pest mgmt, grafted some trees, seeded and planted three vegetable gardens and a whole host of things that I've completely forgotten. As I go through the pictures on my laptop, I will no doubt write a whole slew of blog posts to catch up on what was a busy Spring season. For now, I just want to get up to date on the vegetable situation.
The Veggie Patch
I'd like to say that we have a bumper crop of veggies this year, but sadly, this would be a lie. This time last year we were swimming in tomatoes, cucumbers, eggplants, and cantaloupes. Right now, we harvested tons of potatoes (thank you darling husband), kale, spinach, some carrots, and perhaps a handful of beets and tomatoes. Cucumbers have been a real bummer so far and this is the first year that I've actually lost cucumber plants. As usual the vine borers are taking out squash and melon vines left, right, and center. I've got to come up with some sort of solution for those little evil maggot worms or I'm going to scream (please, please send me advice if you've got any).
The good news is we've still got time to harvest and so we might still get some decent crops before the October frost. I've put more beans in, have transplanted some tomatoes to sunnier spots and have tried to stay on top of the weeding/bug issue. Vine borers and deer seem to be enemies no. 1 & 2 this year with flea beetles right behind them in 3rd position. Funny enough the slugs and stink bugs haven't been overly bad (ed. - knocks on wood).
Anyhow, here's a picture of Jon with our potato crop, a mix of Caribe, Yukon Gold, Russian and English fingerlings. We got almost 2 five gallon pails full.
 | |
| clock-wise left to right: seed potatoes, damages, keepers |
And a few carrots and tomatoes, too!

Thursday, April 14, 2011
Grow and make your own Luffas

So while I deal with broken blocks and mounds of washed out dirt and gravel, I thought it would be good to post a link to a site my husband, Jon, sent to me about home-made luffas:
Home-made Luffas
We've bought our luffa seeds from Southern Exposure Seed Exchange and are planning on growing our own luffas this summer. They need quite a long growing season so we'll be starting our seeds in the greenhouse.
It's a great little blog article and I think even the most apprehensive would-be gardener would get a kick out of giving it a go. So have a look and see for yourself!

Monday, January 31, 2011
Orchards and diggers
With the holidays, etc. sucking up most of my time in December and January, I didn't get a chance to post the pictures of the orchard. Or the pictures of the digger destroying part of our yard. It was quite exciting. Enjoy!
 |
 |
 |
 |
Wednesday, December 8, 2010
Gratuitous canning shot

What's left of the tomatoes. Five jars of canned plus another six jars of green tomato relish that I didn't take a picture of. I'm definitely over canning tomato product.
Tuesday, November 23, 2010
Tomatoes, tomatoes, tomatoes
 |
| That's ALOT of tomatoes |
While everyone was ripping out vines, tilling their soil, I was still desperately holding on inorder to eek out the last wee bit of sunshine and warmth. That's not to say that I didn't rip out beans and such like, but I was loathe to touch the tomatoes. Hell, they were still flowering and creating babies!
And my procrastination (or persistence depending on how you look at it) paid off. We had a bumper late crop as pictured above.
Which raised the question - What do I do with all these tomatoes?
Unfortunately, late tomatoes aren't very tasty. They are normally pithy, a bit bland, and generally a pale imitation of their earlier counterparts. I know when we're getting late in the season by how many are in the fruit bowl - it's in direct correlation to Jon's rye bread with mayo and tomato fetish. When the tomatoes start losing their flavor Jon also starts to lose interest, hence more tomatoes in the bowl.
So what to do with them especially the green ones?
The green ones with the most promise of turning are kept aside in a brown paper bag to ripen. Eventually they will probably become sauce. Those unlikely to do anything other than rot will no doubt be turned into some sort of relish. If you've got vegetables you don't know what to do with, there's always relish/chutney/chow chow/pickle. Sad but true. In fact, I went looking for something different with green tomatoes, but gave up after my 6th or 7th chutney recipe. Having never had green tomatoes before I wanted something fun and exciting. Instead what I got was relish. BUT, I have to say it was pretty tasty relish and in fact, weirdly enough, it resembles hotdog relish. If you've got green tomatoes that you want to use up, try it. You might like it.
My Green Tomato Hotdog Relish Recipe
- 2 quarts chopped green tomatoes
- 1 quart chopped onion
- 3 cups apple cider vinegar
- 3 chopped and seeded green peppers
- 3 cloves of garlic minced
- 1 pound of brown sugar
- 1 1/2 tsp dry mustard
- 1 1/2 tsp ground cloves
- 1 1/2 tsp cinnamon
- 1 1/2 tsp grated ginger
- 1 tsp celery seed
Bring the rest of the ingredients to a boil. Add the tomatoes and onions and bring back to a boil. Simmer for 15-20 minutes. Make sure to stir often. When the tomatoes are translucent, the relish is done.
Pack into hot jars with seals and lids and process for 15 minutes in a hot water bath.
Monday, November 8, 2010
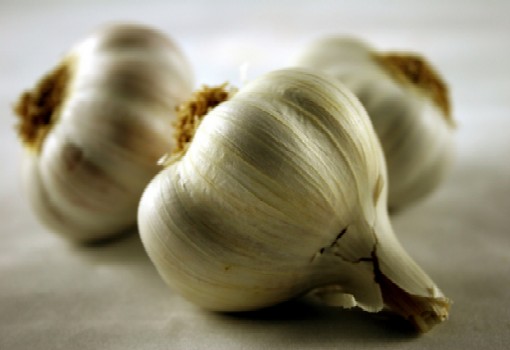
Garlic, Onion, and Kale Oh My!
Well, Guy Fawkes has come and gone. Somehow we ate 60 potatoes, a couple dozen hotdogs, 5 lbs of halloween candy, and who knows how many marshmallows. Even our dogs got in on the marshmallow action by becoming real-life hoovers the next day, vacuuming up all the errant marshmallows out of the woods. You would've thought that we were using pigs to locate truffles given the amount of rummaging and snorting going on. Luckily, the marshmallows didn't really give them that much of a sugar buzz and while my shoes may be covered in the gooey stuff, my kitchen floor, thankfully, is not.
It was also great to see some many people enjoying the fruit of our labor - the pit of despair. Our fire pit was a roaring success and I know of a few unhappy husbands who now have to build their own pits if their wives have their say. Sadly, I took few pictures from said festivities, but I thought I'd share a few passing moments here:
|
| ||||
| |||||


Meanwhile, on the topic at hand, today I am planting our garlic and onions for the spring. Yes, I am probably about two weeks late on this and I hope that my tardiness doesn't cost me next year's harvest - that would really suck especially as last year's harvest was a bit of a letdown. Not so much garlic bulbs as garlic bulbettes that I affectionately called "garlic spring onions". I planted at the completely wrong time of the year last year and suffered for it. Fool me once, shame on you, fool me twice . . . well you know how that goes.
What we're planting is -
- hardneck garlic (Romanian Red)
- softneck garlic (Red Toch)
- shallots (Grey Griselle)
- yellow potato onions
- Egyptian walking onions (over a year old)
And on the kale front, I made kale chips and then proceeded to eat too many. I love kale chips. You may like them too. Here's a recipe:

Ingredients
- 1 bunch kale (I prefer curly)
- 1 tablespoon olive oil (or a light spraying of Pam)
- 1 teaspoon seasoned salt
- 1 tablespoon of apple cider vinegar (optional)
- Preheat an oven to 250 degrees.
- With a knife remove the leaves from the stems and tear into bite size pieces. Alternatively, you can just rip kale off the ribs/stem by hand.
- Wash and thoroughly dry kale with a salad spinner (or spread out on paper towel to dry).
- Drizzle kale with olive oil and sprinkle with seasoning salt (or spray with Pam instead of olive oil if you're prefer less oil).
- Spread out in one layer on a baking tray or cookie sheet.
- Bake until the edges are brown but not burnt, 20-25 minutes. You may need to check on them at 10 minutes and use a spatula to move them around on the cookie sheet.
Subscribe to:
Comments (Atom)