Tuesday, November 23, 2010

Tomatoes, tomatoes, tomatoes

That's ALOT of tomatoes
We were pretty lucky this year in this part of Virginia. Our first killing frost normally appears around Mid-October. But this year, we hit the jackpot. We didn't see our first big one until around the beginning of November and it extended my growing season by at least two weeks if not more.

While everyone was ripping out vines, tilling their soil, I was still desperately holding on inorder to eek out the last wee bit of sunshine and warmth. That's not to say that I didn't rip out beans and such like, but I was loathe to touch the tomatoes. Hell, they were still flowering and creating babies!

And my procrastination (or persistence depending on how you look at it) paid off. We had a bumper late crop as pictured above.

Which raised the question - What do I do with all these tomatoes?

Unfortunately, late tomatoes aren't very tasty. They are normally pithy, a bit bland, and generally a pale imitation of their earlier counterparts. I know when we're getting late in the season by how many are in the fruit bowl - it's in direct correlation to Jon's rye bread with mayo and tomato fetish. When the tomatoes start losing their flavor Jon also starts to lose interest, hence more tomatoes in the bowl.

So what to do with them especially the green ones?

The green ones with the most promise of turning are kept aside in a brown paper bag to ripen. Eventually they will probably become sauce. Those unlikely to do anything other than rot will no doubt be turned into some sort of relish. If you've got vegetables you don't know what to do with, there's always relish/chutney/chow chow/pickle. Sad but true. In fact, I went looking for something different with green tomatoes, but gave up after my 6th or 7th chutney recipe. Having never had green tomatoes before I wanted something fun and exciting. Instead what I got was relish. BUT, I have to say it was pretty tasty relish and in fact, weirdly enough, it resembles hotdog relish. If you've got green tomatoes that you want to use up, try it. You might like it.

My Green Tomato Hotdog Relish Recipe
  • 2 quarts chopped green tomatoes
  • 1 quart chopped onion
  • 3 cups apple cider vinegar
  • 3 chopped and seeded green peppers
  • 3 cloves of garlic minced
  • 1 pound of brown sugar
  • 1 1/2 tsp dry mustard
  • 1 1/2 tsp ground cloves
  • 1 1/2 tsp cinnamon
  • 1 1/2 tsp grated ginger
  • 1 tsp celery seed
Wash and chop the tomatoes to make 2 quarts. Peel and chop the onions to make 3 quarts total. Sprinkle a 1/2 cup of salt on the mix and allow these veggies to stand for 12 hours or overnight. Then put them in a colander and rinse under cold running water. Drain.

Bring the rest of the ingredients to a boil. Add the tomatoes and onions and bring back to a boil. Simmer for 15-20 minutes. Make sure to stir often. When the tomatoes are translucent, the relish is done.

Pack into hot jars with seals and lids and process for 15 minutes in a hot water bath.

Monday, November 8, 2010

Garlic, Onion, and Kale Oh My!


Well, Guy Fawkes has come and gone. Somehow we ate 60 potatoes, a couple dozen hotdogs, 5 lbs of halloween candy, and who knows how many marshmallows. Even our dogs got in on the marshmallow action by becoming real-life hoovers the next day, vacuuming up all the errant marshmallows out of the woods. You would've thought that we were using pigs to locate truffles given the amount of rummaging and snorting going on. Luckily, the marshmallows didn't really give them that much of a sugar buzz and while my shoes may be covered in the gooey stuff, my kitchen floor, thankfully, is not.

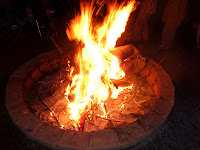
It was also great to see some many people enjoying the fruit of our labor - the pit of despair. Our fire pit was a roaring success and I know of a few unhappy husbands who now have to build their own pits if their wives have their say. Sadly, I took few pictures from said festivities, but I thought I'd share a few passing moments here:

Themis and Jon tend the fire

Watching the Guy burning

Our Guy Effigy

Meanwhile, on the topic at hand, today I am planting our garlic and onions for the spring. Yes, I am probably about two weeks late on this and I hope that my tardiness doesn't cost me next year's harvest - that would really suck especially as last year's harvest was a bit of a letdown. Not so much garlic bulbs as garlic bulbettes that I affectionately called "garlic spring onions". I planted at the completely wrong time of the year last year and suffered for it. Fool me once, shame on you, fool me twice . . . well you know how that goes.

What we're planting is -
  • hardneck garlic (Romanian Red)
  • softneck garlic (Red Toch)
  • shallots (Grey Griselle)
  • yellow potato onions
  • Egyptian walking onions (over a year old)
Unfortunately, I waited too late to buy my onion and garlic sampler from Southern Exposure Seed Exchange and so I ended up with a hodge podge of varieties that I haven't planted before. The walking onions are left over from last year's purchase so they may or may not grow. I am seriously tempted to plant them under a tree and let them be, but I may just pot them up and stick them in the greenhouse for now.

And on the kale front, I made kale chips and then proceeded to eat too many. I love kale chips. You may like them too. Here's a recipe:


Ingredients
  • 1 bunch kale (I prefer curly)
  • 1 tablespoon olive oil (or a light spraying of Pam)
  • 1 teaspoon seasoned salt
  • 1 tablespoon of apple cider vinegar (optional)
Directions
  1. Preheat an oven to 250 degrees.
  2. With a knife remove the leaves from the stems and tear into bite size pieces. Alternatively, you can just rip kale off the ribs/stem by hand.
  3. Wash and thoroughly dry kale with a salad spinner (or spread out on paper towel to dry).
  4. Drizzle kale with olive oil and sprinkle with seasoning salt (or spray with Pam instead of olive oil if you're prefer less oil).
  5. Spread out in one layer on a baking tray or cookie sheet.
  6. Bake until the edges are brown but not burnt, 20-25 minutes. You may need to check on them at 10 minutes and use a spatula to move them around on the cookie sheet.
This is just the basic recipe. You can substitute seasoning salt for sea salt. Try it with garlic powder or curry powder. Very tasty. There are endless combinations. If you get a combo you really like, let me know!

Tuesday, November 2, 2010

The Pit of Despair

Not exactly SSF material per se, but thought it worthy of posting here.

Themis and Jon - the A Team
The story went something like this.

Two years ago (approximately), I bought a bunch of concrete wall blocks at 20% off from Allied Concrete. I had seen some fantastic wall work at my neighbor Dan's house, which he had built himself. So I thought, "Hey. If Dan can do it, we can do it!" Ahh, such enthusiasm.

The blocks showed up on a ginormous palette - caps and all. That was pretty cool. Got to see a lorry try to reverse down our driveway which was also spectacular. Unfortunately, what wasn't so cool was the color of the block. The James River Range was less tan and terracotta and more, well, let's just say PINK. Yep, good old-fashion dusty rose pink. Ugh. So now I had $300 dollars worth of ugly pavers.

Cut to August of this year. In my commitment to build neighborly spirit and to invest in my community in general, I opted to throw a big Guy Fawkes Night for the entire neighborhood. Yep, Sections I, II, & II. For those who don't know what Guy Fawkes Night is, check out Wiki. While that's a lot of people, I was actually sweating the bonfire part, not the people part.

As of September 1st, we still had a big forest with no fire pit. With the help of my dad, we cleared some pines out and now had some open land, but still no pit. Jon wanted to just dig out a small hole and throw some rocks around it, but I had bigger plans . . .

Enter the ugly pink pavers.

Yep. Jon called me crazy. Themis said it wasn't necessary. But I wouldn't listen. What a perfect way to get rid of the ugly blocks and also add an outdoor feature to our house. (I've been watching too many home programs on HGTV).

What I didn't realize when I had this brilliant idea was how much bloomin' work it was going to be.

First off, I wasn't happy just building a small fire pit. Oh no. I had to build an 8 foot wide fire pit. And honestly, the block wasn't the problem - we had plenty. The issue was digging the hole in such a way that we could bury the first course. Don't even ask how many cartfuls of dirt we took out or how many times we almost got the tractor stuck down in Narnia. Some weekends it wasn't pretty.

The beginning.

Next came the leveling. Once we got most of the dirt out, we had to use a tamper in order to ensure that the outside of the ring was level. Easier said than done when a) you build said pit on a slope and b) you try to build pit on top of a boulder. The boulder wasn't fun. Ask Jon. He did most of the sledgehammer work chipping away at horrible big boulder.

Foundation is laid.

Jon gives up the ghost.
Once the leveling was done, we put down 40 lbs of sand around the perimeter of the circle to give us some wiggle room when setting the first course. The first course has got to be right - it's the foundation for the rest of the wall. So we get the foundation down when Jon says to me "Um, you're going to hate me for saying this, but I think those blocks are upside down."

Unfortunately, he was right. So I had to flip them all over and re-measure each brick from center to make sure we kept our perfect circle. (Math has never been my strong suit).

Once the foundation was laid, the rest went smoothly. Thank God. And in fact, I would even go as far as to say it actually wasn't too bad laying the blocks. We used up 98 1/2 blocks, which I have to say was pretty spot on given the fact that I had 100. I didn't even measure! Luck just happened to be on my side.

And to to finish the look, we topped the new fire pit with the caps that had come with the blocks (although they really need to be individually cut to sit properly and possibly be concreted down. But hey, I was pretty impressed to get this far.)

Finished Fire Pit.
In the end, we have a big and lovely fire pit that probably took three weekends to build. Two weekends more than Jon would've liked. And we got rid of all the ugly block as well which was a bonus.


Am I happy with the end result? I think so. Is Jon? Well, better to not ask I that one, me thinks.